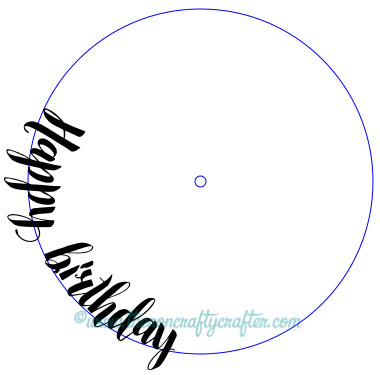
Curving text in Inkscape is easy!!
Download Inkscape from here:
www.inkscape.org (That's the official and only safe site to download Inkscape.)
Tip: At any time if everything looks a bit small on the Inkscape screen click the + button on your keypad to zoom in. Click the - key to zoom out. Hold down the space bar and move your mouse to re-position the screen. Let's begin!- Open Inkscape and click the circle toolbar icon
- Hold down the Ctrl key and drag out a circle. (Holding down the Ctrl key stops the circle changing to an oval. So if you want an oval, don't hold down the Ctrl key.)
- Change the Fill and Stroke properties as follows:
Fill - none (click the x)
Stroke paint - Flat colour (the second button). Any colour will do.
Stroke style - Width 1.000 (can be anything really but that's what I use.)
(If the Fill & Stroke properties box doesn't appear on your screen click on one of those properties in the bottom left of the Inkscape screen to open it.)
- Select the circle and click the Path menu, then Object to Path.
- Click the Text icon, then click on the workspace (don't click and drag - just click) and type your text.
- Click anywhere inside the text then click on the arrow next to the font name and select the font you want to use.
- Click on the Select tool then hold down the Ctrl key and click the bottom right arrow around the text and resize it to your desired size.
- Hold down the shift key and select both the circle and the text (or drag your mouse around them both) and click the Text menu then Put on Path.
Your text will be place around the outside of the circle!
Placing the text on the inside of the circleIf you want the text on the inside of the circle instead...
- Click the Flip vertical button on the toolbar (or select Object, Flip Vertical)
Now the text is inside the circle!
Rotating the text around or within the circleYou can rotate your text around the circle by clicking twice on the text so that you see the rotate arrows around it. Use one of the corner arrows to rotate it.
But, you'll see that it doesn't move around the circle properly. Click
Edit, Undo (or Ctrl Z) to undo that change.
- Select just the circle and use Ctrl D to duplicate it. The duplicate will be placed right on top of the original circle.
- Hold down Shift and Ctrl, then using one of the corner arrows drag the circle in so it's very small. Tiny even.
- Click on the text twice. (Not too fast or your cursor will appear.) You'll see a small + appear inside the large circle.
- Hover your mouse over the top of the + and it will turn red.
Click on the + and drag it into the middle of the tiny circle. (Click the + keyboard key if you need to zoom in.)
Now click on one of the corner arrows around the text and you will see that it now rotates around the circle properly.
Occasionally my text disappears when I rotate it. If that happens I just select
Ctrl Z to undo, the rotate it again.
Getting your text ready to export to Design SpaceNow that you have created your curved text you need to get it ready for Design Space. You won't be needing the circle, but you can't just delete it. If you do, your text will revert back to how you had it before you curved it.
To stop that happening you need to make your text a path.
- Select just the text and click Path, Object to Path.
- You can now go ahead and delete the two circles.
- Select File, Save As and give your file a name.
From the "Save as type" box select either Inkscape SVG or Plain SVG. Either will work.
You're done! You've just created your first curved text!
Now you're ready to import the SVG into Design Space.
Happy crafting! �
 This website and its posts may contain affiliate links. If you purchase a product using the link I may receive a small commission.
I only participate in affiliate programs for products that I use and love.
Using the link is totally optional! If you don't wish to purchase through the link, you can go directly to the website and purchase from their shop. Please note there is no price difference to you between using the affiliate link and purchasing direct from the website. O
Any commission I receive is used to offset the costs of maintaining this website (domain fees etc) and file/photo storage fees for files that I share with my readers. It also goes towards the cost of giveaways and postage at Cricut Lovers Guide to Design Space Facebook group.
I have affiliates with Cricut.com, MightyDeals and InLinkz �