Using 3rd party programs to convert SVG's for use with Cricut Design Space
Date: 20:25There are many SVG's available for use with Design Space. But some import into Design Space better than others. That's dependent on which design program was used to create those SVG's.
Some SVG's will import just as a black box. Some will open as a blank box with a broken link at the top. And some will open with all the layers on top of each other. (See examples below.)


When this SVG is inserted onto the DS canvas this is what it looks like. Not ideal!

There's a very simple way to fix these files though if you have a 3rd party program such as Sure Cuts A Lot version 4, Make the Cut, Craft Artist 2 or even Inkscape.
I've found that SCAL4 is the quickest program to use to do this. But it is a program you have to purchase at a cost of around $60.
Make the Cut ($60) and Craft Artist 2 (�21 - approx $32 depending on exchange rate) are also programs you can purchase. These also do the required job but will give you an extra step to do once the file is imported into Design Space.
Inkscape is of course free! It can also be used but does require extra steps both within Inkscape and once you import into Design Space.
First I'm going to show you how to convert a file in SCAL4. I'm using the Accordion Christmas Pudding card from Tina's Cutting Files Studio as an example. The images above show how this file imports in Design Space before being converted in SCAL.
(I'll also be showing you how to do the same process using the other three programs above.)
Sure Cuts A Lot 4
Open SCAL and click the Import SVG button.

Select the file you want to import and click Open.


Give your file a new name (I generally just type SCAL at the end of the existing file name) and click Save.

The Export Options box will appear. In this box you must check the "Design Space compatible" box.
Leave the Resolution at 72 DPI but the other two options don't matter. Checked or unchecked makes no difference for what we're doing.
Click the OK button. You won't get a message saying that it's saved. You'll just be returned to the main SCAL design screen.


The file when it imports into Design Space will be huge! Therefore you should take not of the width or height measurements shown in Inkscape.


Design Space Tip: Make sure zoom is at 100% when you resize in Design Space otherwise the size won't be correct or in proportion.


Make the Cut instructions will be here.

Some SVG's will import just as a black box. Some will open as a blank box with a broken link at the top. And some will open with all the layers on top of each other. (See examples below.)


When this SVG is inserted onto the DS canvas this is what it looks like. Not ideal!

There's a very simple way to fix these files though if you have a 3rd party program such as Sure Cuts A Lot version 4, Make the Cut, Craft Artist 2 or even Inkscape.
I've found that SCAL4 is the quickest program to use to do this. But it is a program you have to purchase at a cost of around $60.
Make the Cut ($60) and Craft Artist 2 (�21 - approx $32 depending on exchange rate) are also programs you can purchase. These also do the required job but will give you an extra step to do once the file is imported into Design Space.
Inkscape is of course free! It can also be used but does require extra steps both within Inkscape and once you import into Design Space.
First I'm going to show you how to convert a file in SCAL4. I'm using the Accordion Christmas Pudding card from Tina's Cutting Files Studio as an example. The images above show how this file imports in Design Space before being converted in SCAL.
(I'll also be showing you how to do the same process using the other three programs above.)
Sure Cuts A Lot 4
Open SCAL and click the Import SVG button.
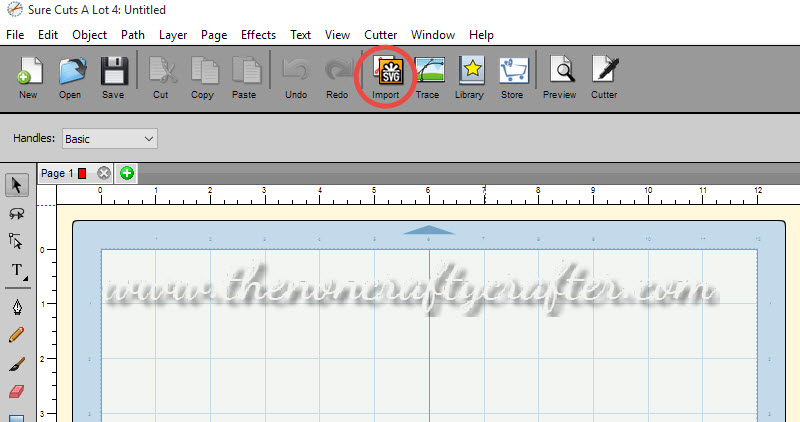
Select the file you want to import and click Open.
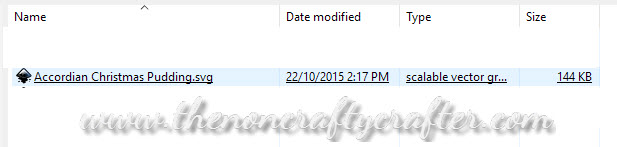
The design will show on your screen.

You can click the x on any of the properties boxes to get them out of the way.
And you can also zoom your screen out so you can see the entire design.

You can see that the file has imported very differently to how it did in Design Space. All the shapes are where they are supposed to be!
Next, click on the File menu and select Export

Give your file a new name (I generally just type SCAL at the end of the existing file name) and click Save.

The Export Options box will appear. In this box you must check the "Design Space compatible" box.
Leave the Resolution at 72 DPI but the other two options don't matter. Checked or unchecked makes no difference for what we're doing.
Click the OK button. You won't get a message saying that it's saved. You'll just be returned to the main SCAL design screen.
Now it's ready to import into Cricut Design Space.
For information on how I used this file in DS please see this blog post:
Inkscape instructions:
- Open Inkscape and select File, Import

- Select the file and click Open

The file when it imports into Design Space will be huge! Therefore you should take not of the width or height measurements shown in Inkscape.
- Click the down arrow next to the height measurement and change to inches then write down either the width or height. Either will do. When you import the file into Design Space you'll use that measurement in the Edit box.


Design Space Tip: Make sure zoom is at 100% when you resize in Design Space otherwise the size won't be correct or in proportion.
- Select File, Document Properties

- Click Resize page to content

- Click Resize page to drawing or selection

- So that you can better see the images select View, Display Mode, Outline

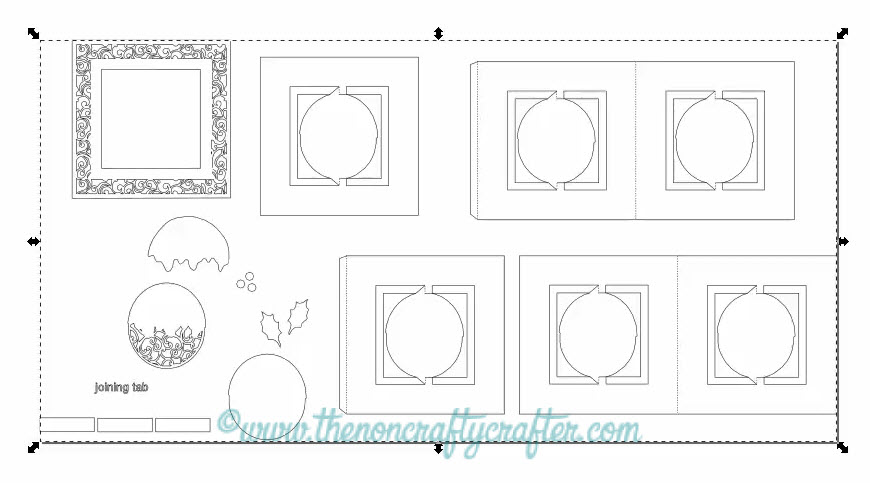
- With the images selected click Object, Ungroup. (Or Ctrl + Shift G)

- Now drag your mouse around individual images and select Object, Group (or Ctrl G)


- Repeat for each individual image. You can group the berries and leaves together. You can also group the three small rectangles together.
Be careful not to move any of the shapes outside the bounding box. Just click Edit, Undo (Ctrl Z) if you do.


- Once you have grouped each individual piece drag your mouse around the entire set of images (or Edit, Select All/Ctrl A) and select Edit, Group. (Ctrl G)

- Select File, Save As and save the file as a SVG. I just add Inkscape to the end of the original file name. You can select Inkscape SVG or Plain SVG. Either will work.

Now you're ready to import the SVG into Design Space. For info on how to use the file in DS please see this post: (There's a little more work you need to do in DS before cutting.)
Make the Cut instructions will be here.
Craft Artist 2 instructions will be here.
Happy crafting! �


