Design Studio etiketine sahip kayıtlar gösteriliyor. Tüm kayıtları göster

CRICUT - Comparison Chart CCR vs Ds vs Gypsy vs Design Space


Cricut Craft Room/Design Studio/Gypsy/Design Space

A comparison by Narelle Darley � The Non-Crafty Crafter
(Updated to add Design Space - 18/02/2014


* If you use PC emulating software you can run DS on a Mac
** Whilst you can use the Jukebox with CCR you may still have to press the correct button to select your cart/s.
*** Unless you save your DS file as a Gypsy file.

Devamını Oku

CRICUT: Design Studio - What is Real Dial Size?

This tutorial originally posted on my Design Studio blog 8th November, 2010


The Real Dial Size button is used to cut your objects exactly the size you have set on the Cricut.
Design Studio also has this feature. You�ll find the Real Size checkbox just under the virtual keypad. Tick the box to use Real Size.

Capture01

So how does Real Size work?

Well, first a little background�.
Many Cricut Cartridges (mainly font cartridges) have a character that is the �Key Height Character.� That character is the tallest character on that cartridge. All other characters in that cartridge will be sized and cut in proportion to that Key Height Character.

If a cartridge has a Key Height Character it will be shown in red in your cartridge handbook.

Capture03

However, if you use the Real Size feature, the Key Height Character is ignored and all your letters and shapes will be cut exactly at the size you have selected on the Default Size slider.

You must check the Real Size box BEFORE you place your objects on the virtual mat.

Below is an example of a word typed without using Real Size and under that the same word typed with Real Size selected.

Capture02

In the first example notice how all the letters are in proportion to each other, whereas in the second example all the letters are exactly the same height.

When you are cutting objects that have layers, it is crucial that you have Real Size turned OFF.

Here�s another example using the Everyday Paper Dolls cart. The top row has Real Size turned on. The layers won�t fit because they have been cut out the same height as the body.

The second row has Real Size turned off. All the layers will fit as they will cut out in proportion to the body.

Capture04

And here she is all put together:

Capture07
Devamını Oku

CRICUT: Design Studio - Renaming pages

This tutorial originally posted on my old Design Studio blog - 15th November 2010


If you have multiple pages in your design it's sometimes useful to rename them from "untitled page" to something a bit more descriptive.

Here's how you do it:

  • Right click somewhere on your page (not on the tab as you would expect)
  • Click inside the box under "Change Page Name"

  • Highlight "untitled page"
  • Press delete.
  • Type the new name in the box. (You can also overtype "untitled page" with your new name instead of deleting it.)
  • Press Enter or left click Change Page Name


Devamını Oku

CRICUT: Design Studio - Positioning your paper on the mat

This tutorial originally posted on my old Design Studio blog - 23rd November, 2010


When first using Design Studio it can be a little confusing working out where to position your paper on the mat. 

Here's the easiest way I know:

Look at the virtual mat on the DS screen. On the left of the mat is an arrow.


Now look at your real mat. It has a matching arrow.

Place your real mat in front of your computer monitor with the arrow facing to the left.

Now that the two mats are matching, place the paper on your mat so that it covers the design on your virtual mat.


All you need to do now is insert the mat into the cricut (arrow first) and press the Cut button in DS.

You can also load the mat backwards. Just think of the hanging hole as another arrow. Make sure you place the paper accordingly though.

Hope that makes sense. Sorry for the glare in the photo... AND the finger prints on the monitor!!
Devamını Oku

CRICUT: Design Studio - Errors

This tutorial originally published on my old Design Studio blog 16th January 2011.


There are several errors that pop up in Design Studio occasionally. I thought I'd start a list and the possible causes and fix for them.

1. "Out of memory"


Just before you see this error your DS screen will go blank apart from a red X. 

This usually happens when you are stretching a rectangle from the George cartridge and you are viewing the page at 100% but it can happen any time. Luckily not too often!

How can you fix this without losing all your work?
  • Click the Continue button. The message box will go away and you will see a blank screen with just the Red X.
  • Select File, Save (or Save As and give it a name if you haven't saved the file previously).
  • Once the file has saved select File, Close
  • Select File, Open and open your file. Your work should reappear up to the point just before you got the error.
  • Change your view to Fit View and delete the offending rectangle.
  • Save your work again and continue.
How do you stop this happening?

Try using the square shape from George instead of the rectangle. 


2. "String was not recognized as a valid date/time."


This error pops up when you open a file that was created in a country that uses a different date format to yours.

Here's a link to a previous post I did on this error and how to fix ithttp://thenon-craftycrafter.blogspot.com.au/2014/02/cricut-design-studio-fixing-date-errors.html


3. "Object reference not set to an instance of an object" 
  
This one usually means that you don't have the cart used in the design in your DS cartridge library - either because you have removed that cart from the c:/programfiles/cricut software/Cricut DesignStudio/Cricut Fonts directory OR because you need to update DS to include that cart.

Make sure Design Studio is up to date (including the two cartridge updates.)

If you removed carts from the Cricut Fonts directory here's the info on adding them back in. (It's towards the end of the post): http://thenon-craftycrafter.blogspot.com.au/2014/02/cricut-design-studio-speeding-up-ds.html


Devamını Oku

CRICUT - Design Studio - Fixing Date errors in DS

This tutorial originally posted on my old DS blog 4th February, 2009


If you try to open a file created by someone who lives in a country that uses a date format different to yours, you will most likely get an error that looks like this:


When you get this error you have no choice other than to close Design Studio. After you have closed it, re-open it so it's loading while you doing the next part - that way you don't have to go make a coffee while your waiting for it to load...

According to Wikipedia the following countries use the mm/dd/yyyy format:

Belize
Canada
Federated States of Micronesia
Kenya
Palau
Philippines
Puerto Rico
United States

Most everywhere else uses the dd/mm/yyyy format (the correct way - but let's not go there... ) :)

To be able to fix the date error, you need to change the date within the file. Here's how:

You will need a Hex Editor program such as:

Free Hex Editor Neo
Cygnus Hex Editor
Hexedit

There are many more available. Just google "free hex editor".

I'll be using Free Hex Editor Neo for this tutorial as it's Windows based.
  • Start your hex editor software.
  • Select File, Open (or click the Open file toolbar button)
  • Navigate to the directory you saved the .cut file to, highlight the file and click the Open button
You should see something like this:


The section you need to change is circled below:


In this example the date is in mm/dd/yyyy format - 10/22/2008. We'll change it to the dd/mm/yyyy format - 22/10/2008.

It doesn't matter what date you put here, so long as it's in the correct format for your part of the world (or how you have set the date regional settings on your computer).

We're going to change the 22 to a 10. That way the date will read 10/10/2008 - acceptable for everyone's computer. I save all the files I share in this way. I just make sure the month and day are the same number eg. 10/10/2008, 02/02/2008. I also change the year if necessary so that the actual date has occured. Not sure if that's necessary, but I do it anyway.
  • Click on the first 2 in 22.
It will be highlighted.
  • Type a 1 - the 2 will be overwritten
  • Type a 0 - the other 2 will be overwritten
The parts you have changed will turn red.

Now the important part. You need to save the changes to this file.
  • Select File, Save As
You can give the file a new name if you like, which means your original file will still be intact, or give it the same name, which means it will overwrite the original file.

We'll give it the same name.
  • In the file name box type the original name of the file. (You will see the original file name on the tab at the top of the Hex Editor screen)
  • Make sure the file name still has .cut at the end
  • The Saved As Type will stay as "All Files"

  • Click the Save button
  • Select File, Close
If you forgot to save the file you will be prompted at this stage to do so.

If you saved your file as a new name, you will have two files to close. In that case you can also select File, Close All (or File, Close - twice.)

You will be asked if you want to save both files. You can say No to the original file but make sure you save the amended file.
  • Now you can go back to Design Studio (it should be open by now) and open your file.
Devamını Oku

CRICUT: Design Studio - Speeding up DS load time

This tutorial originally posted on my old Design Studio blog - 7th September 2010
 

As more and more carts are added to DS the time it takes to load increases. Here�s a way to speed up the loading time.

Thanks and credit to Tam from 
this and sharing it with the members of the cricut.com messageboard. 

Are there lots of carts that you don�t own, and think that you�ll never own? If so, you can remove them from DS. This means that DS doesn�t have to load them at start up.

Note: You won�t be actually deleting the carts permanently, but moving them to a different directory on your computer. That way, if you do buy one of those carts (or want to be able to see it in DS) you�ll be able to move it back into the Fonts directory and it will show up again.

And don�t worry � if you completely muck this up you can just uninstall DS and reinstall it again and all will be well!

Here�s how you do it:

  • Make sure DS is closed
  • Open up Windows Explorer.
Your screen should look something like this:


If you can't see the following Cricut Software folder in Program files, you may need to change your Folder viewing options:
  • Select Tools, Folder Options, then the View tab.
  • Make sure "show hidden files, folders and drives" is selected then click Apply, then OK to close that box.


I�m using Windows 7, so your screen might look a bit different if you�re using Vista or XP.
  • Navigate to: C: --> Program Files --> Cricut Software --> Cricut Designstudio --> Cricut Fonts
    You should see these 5 folders:

    Now we need to create a backup folder where we�ll copy all the fonts. This backup folder must not be inside the existing Cricut Fonts folder.  We need to go back up one directory.
    • Click the Cricut DesignStudio folder from the top of the screen.


    • Click the New folder button. If you don�t see a New folder button select File, New, Folder.

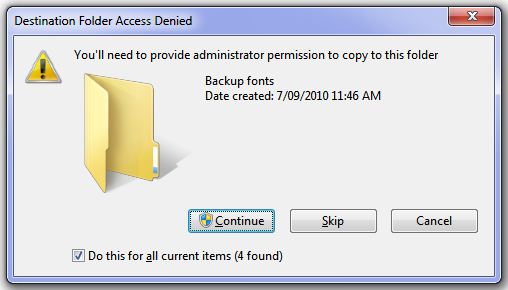
    Because we�re working with system files you may need to confirm this operation. 
    • Click the Continue button.
    • Overtype �New folder� with Backup Fonts (or whatever name you choose) 
    • Press Enter
    You should see these folders:


     Next we�re going to COPY all the contents from the 5 fonts folders into the Backup fonts folder.

    •  Click on the Cricut Fonts folder
    • Select Ctrl A (or Edit, Select All)

      Now all 5 Fonts folders should be selected.


      • Select Ctrl C (or Edit, Copy) The font folders will be copied to the computers clipboard
      • Go back to the Cricut DesignStudio folder
      • Click on the Backup fonts folder to open it. (It will be empty)

      • Select Ctrl V (or Edit, Paste)
      • Again, you may need to confirm this step. Click the Continue button

      The Fonts folders will now be copied to the new Backup Fonts folder.

      So now you have your backups created. Next you need to delete the fonts you don�t use from the original Fonts folders.
      • Navigate back to the original Cricut Fonts folder and open the CricutFontsA-C folder
      You�ll see all the carts from that folder. 
      • Hold down the Ctrl key and hover your cursor over a cart you want to delete until it�s selected. 
      • Keep holding down the Ctrl key down and continue to select the carts you want to delete. (Older versions of Windows may require you to Ctrl + click to select.)
      If you accidently select a cart, just move you cursor away from that cart, then hover over it again and it will be unselected.

      (You can also just delete the carts one by one if you find that easier.)
      • Once you�ve selected all the carts you don�t want DS to load, press the delete key.

      • Click Yes to confirm you want to delete those carts.
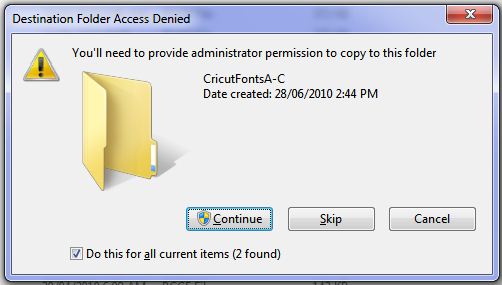
      • Again, you may need to confirm this operation. Click the Continue button.
      • Repeat the above steps for the 4 remaining Fonts folders, deleting any carts that you don�t want DS to load.
      Now go start DS and see how much faster it loads!


      Please note: If you open an existing file that uses a cart that you have removed from the cart library you will get an error message. You will need to close DS, copy the missing cartridge back into the cartridge library then reopen DS. Unfortunately the error message doesn't tell you the name of the cart that is missing.

      * * * * * * * * * * * * * * * * * * * * * * * * * * * * * * * * * * * * * * * * * * * 

      Adding carts back in

      The time will most likely come where you will purchase a new cart and want to be able to see and use it in DS. Here�s how to add carts back in.

      • Close DS
      • Navigate to: C: -->Program Files --> Cricut Software --> Cricut Designstudio -->  Backup Fonts
      • Then open the folder that contains the cart/s that you want to add back into DS and highlight them. (Again, use the Ctrl key if there�s more than one).
      • Once you have highlighted COPY your cart/s by selecting Ctrl C (or Edit, Copy). They�ll be copied to the clipboard.
      • Navigate to the original corresponding Font folder and select Ctrl V (or Edit, Paste).
      •  Click Continue at the inevitable message box:
       
      Your carts will now reappear in the correct Fonts folder (assuming you selected the right one).

      • Open DS and those carts will now show up again.
      Remember, if you totally muck it up you still have your backup files plus if necessary you can uninstall DS and reinstall it.

      Devamını Oku

      CRICUT - CCR - Importing Design Studio and Gypsy files into CCR

      Originally posted on my old Design Studio blog - January 6, 2012

      Do you have a lot of Design Studio and/or Gypsy files that you would like to use in CCR? Well, here's how you go about importing them.

      1. Importing Gypsy files into CCR
      (This is for files that you or someone else have created using the Gypsy.)
      • Make sure CCR is not running. (You'll get a debug error message if you have CCR running and will have to select Abort then close CCR.)
      • Connect your Gypsy to your computer with the Gypsy USB cord
      • Power on the Gypsy
      • Open Cricut Sync


      • When your Gypsy has connected and has checked for updates click the OK button. (If your Gypsy hasn't been updated for a while you may want to do the updates first although you should be able to skip that process and proceed with the file transfer.)


      You will see a list of the files on your Gypsy


      Next you need to transfer your Gypsy file to your computer. 
      • Open Windows Explorer and select a location for your file 
      The default location for Cricut files is C:/Documents/Cricut/Projects but you can select any location on your computer, even the Desktop. I'll be using the default Projects folder.
      • Click the middle right hand button at the top right of the Windows Explorer screen to make that window smaller

      Next, position the Windows Explorer and the Cricut Sync windows so you can see both on the screen


      • Scroll through the list on the Cricut Sync window and locate the file you want to transfer to your computer
      • Highlight the file you want to transfer then click and drag it over to the Windows Explorer screen.

      You should see a symbol a bit like this as you move your cursor over the Windows Explorer screen.

      • When you have your mouse positioned over the Explorer window release the mouse button. Your Gypsy file will be copied to your computer and will show up in the list of files.


      • Check and make sure the file size isn't 0KB. If it does appear as 0KB the file won't import into CCR. If that's the case repeat the process above
      2. Now you need to import your file into CCR.
      • Exit out of Cricut Sync
      • Disconnect your Gypsy from your computer (or power it off)
      • Open CCR and login to your account
      • When you are at the Projects screen click the Import button

      • Navigate to the folder you copied your Gypsy file to

      • Click the file and press Open
      The file will appear at the top of your Projects list


      • Single click the file to select it and press the Open button (or double click next to the file name)
      The file will appear on your CCR mat.

      You will notice that the orientation of the file is different to how it appeared on your Gypsy. That's because the mat arrow on the Gypsy is on the left


      Whereas the mat arrow on the CCR mat is at the top.


      You can either leave your objects as they are or you can use the Rotate feature in the Shape Properties menu and rotate your objects 270�. 


      In the design above I would change my mat size to 12x12 before rotating the objects then change it back to 6x12 if I'm cutting it out on the Personal or the Create.
      • To change the mat size select the Options Menu
      • From the Project tab change the default machine to the Expression 
      • Change the Mat size to 12x12
      You may also find that your objects will be grouped. 
      • To make any changes to individual objects select the group by clicking anywhere on one of the objects then click the Ungroup button on the toolbar.

      That's it for importing Gypsy files. Now onto Design Studio files.


      3. Importing Design Studio files into CCR
      Currently, if you have the full version of Design Studio you can save your DS files as Gypsy files. If you haven't done that before here's how you go about it:
      • With your file open in DS select File, Save As

      • Highlight and delete everything inside the File name box

      • Type in a new file name. (It can be the same as the Gypsy file or something different)
      • Click on the Save as type box

      • Select Gypsy files (*.gypsy)
      • Click the Save button

      • Select File, Close. (You can leave DS open if you want. Just make sure the file is closed.)

      • Once you have your DS file saved as a Gypsy file follow the instructions above to import the file into CCR.
      Devamını Oku
      Blogger tarafından desteklenmektedir.

      © Copyright Handbooks and Design Space Image codes